
(You can listen to the podcast by clicking the play button above or read the text below. It’s more or less the same content.)

Once again, I’ve averted (just barely) another kitchen disaster!
I admit that I was raised in a time and place where processed, prepared, frozen, and canned food was my mother’s first choice for food prep. Unfortunately, neither she nor my grandmother, who lived two houses up the street and should have been close enough to help, were particularly good at “old fashioned home cooking,” so I was in my 3rd or 4th decade before I became friends with any kitchen appliance that was not a microwave.
Since then, I’ve tried – really tried – to cook and bake my way through any number of cookbooks. Mostly with moderate success, sometimes with disastrous results, and – glory be – an occasional amazing dish.
I recently avoided disaster, thank goodness!
It was Saturday – and we have homemade pizza every Saturday or every other Saturday. So I stirred yeast into some water, let it sit; next added flour and salt. After kneading for a bit, I covered the bowl to let it rise.

Then… Life got in the way. Not Pizza Night!
The answer: shove the dough into the fridge and make it on Sunday.
Come Sunday and it just didn’t feel like Pizza Night either, so I pulled out a plastic container, dumped the dough into it, covered it, and everything got chucked into the freezer.
The following Tuesday seemed like a good time to try again. Out on the counter with the dough to thaw for supper. Those little yeasties had way more life in them than I thought – the dough swelled up and popped the top right off the container!
Oops, no pizza tonight, either. Back in the fridge for the yeasty beasties.
By Wednesday night I was worried that the little ball of pizza dough was destined for the compost bin. But, wait, there is an alternative – flatbread. Or if we’re lucky – pita!
Bright and early Thursday morning, when the kitchen was still cool, was the perfect time to do a little baking. Out came the dough ball!
I heated the oven to 450ºF degrees and tossed a pizza stone on the upper shelf. Good thing we had a low of 43ºF degrees last night, since the stone has to preheat for about 45 minutes.
The key to pita pockets (our hoped for result) is to roll them out thin, bake them on a HOT stone, and keep your fingers crossed that they actually puff ALL the way up. (That part is necessary, you know, for you to be able to call it pita bread and not just flat bread.)
Not too long ago I bought one of those French rolling pins that is thicker in the middle than on the ends. It’s perfect for this kind of project – light, easy to handle, and gives you so much control to roll the center or edges to the perfect thickness.
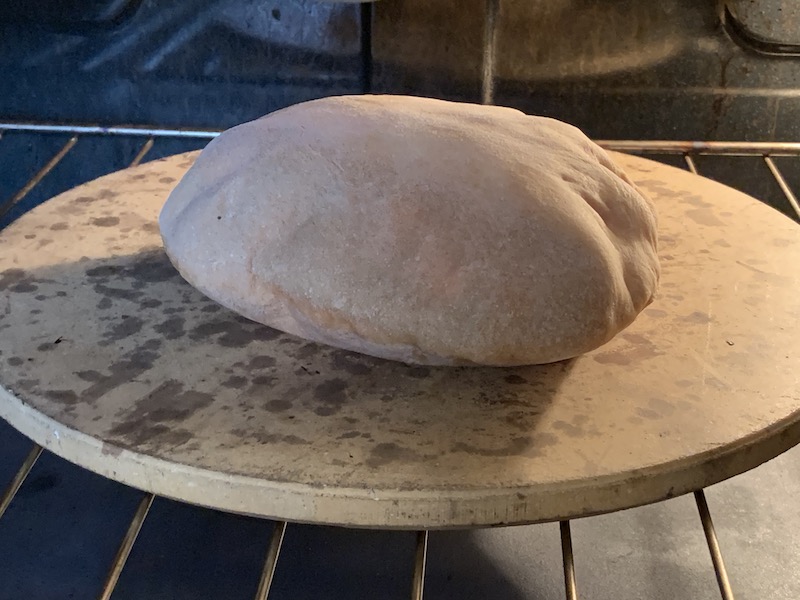
I love picking up the dough and laying it across my palm and spread fingers, then turning my hand over and slapping it on the stone. Let it bake 4 to 5 minutes, checking once to make sure the bread is puffing like a balloon. Actually, there’s nothing you can do at this point if it isn’t, so just relax. It is what it is.
When you take the bread out of the oven, put it on a folded kitchen towel to cool. If you’re doing more than one, repeat and put the second one next to the first on the towel, not on top of it.
Once you’re done baking and those cute little puffy pitas are cool, serve yourself lunch – or supper! Cut that pita pocket in half, push open the layers, and fill with whatever you have on hand.
Now about that filling… I think it was Sunday night (the night that just didn’t feel like Pizza Night, the first time) when we made something that started out as a rice pilaf and turned into a green fried rice. Way more fresh herbs from the garden than planned, but oh so good.
So I filled my pita pockets with the leftover green fried rice and it was heavenly!
What have you done to avoid a potential baking disaster, with or without leftovers? I’d love to hear what you’re stirring up.
Here’s my pita/pizza dough recipe.
Ingredients
200 grams bread flour
50 grams whole wheat flour
175 grams warm water, about 95ºF
1 1/2 teaspoon dry yeast
1 teaspoon salt
Preparation
- In a medium bowl, mix the water and the dry yeast. Whisk to dissolve the yeast in the water. Let sit about 10 minutes, or until it is foamy.
- In a separate bowl, add the bread flour, the whole wheat flour, and salt. Mix completely with a whisk.
- Add the flour and salt mixture to the water and yeast.
- Mix with a wooden spoon or flexible spatula until the dough comes together into a ball.
- Put a little flour on the counter top and knead the dough for 8-10 minutes, until it makes a smooth ball. If it’s too sticky, add a little flour until you can knead it easily.
- Wash and dry the mixing bowl and add about 1/2 to 3/4 teaspoon olive oil. With your hands, coat the bottom and sides of the bowl.
- Put the ball of dough into the oiled bowl, coating the dough with the oil. Press down into a flattish ball.
- Cover and let rise for about 1 1/2 or 2 hours, or until the dough has about doubled.
- Punch down, cover, and put the covered bowl of dough in the refrigerator overnight or for up to 3 days, until you’re ready to make your pitas.
Baking Pitas
- Put a pizza stone in your oven and preheat your oven and stone to 450ºF for 40-45 minutes.
- When you’re ready to bake, cut or pull the dough into 6 or 8 even balls.
- Flour your work surface, and pat one ball of dough into a hockey puck shape.
- Sprinkle a little flour on the work surface and on the disk of dough. Roll it out into a 5″-6″ disk about 1/8″ thick. Thin is good. Really thin is really good!
- Carefully pick up the dough disk, and spread it out on your hand. Invert it on the baking stone quickly to avoid it crumpling up. It takes a little practice, but we’re not aiming for perfection here.
- Let each pita/flatbread bake for 4 to 5 minutes and carefully remove it from the hot stone with a large spatula. Put the hot bread on a folded kitchen towel to cool.
- Repeat steps 3-6 until all your balls of dough have been baked.
Serve at room temperature; or to store, cool the breads and put them in a sealed plastic bag in the freezer. When you pull them out of the freezer, reheat your bread for 10 minutes in a 350ºF oven.