
 About two years ago I started experimenting with making my own sandwich bread. I knew it wasn’t too difficult to put out a nice fluffy loaf of white bread (and I think I might have once or twice) but if Wonder Bread is what I really wanted then I wouldn’t be making my own bread in the first place. From the start I knew that this mission was all about incorporating whole grains. I want to bring bread back to the basics: handmade, unrefined (or less so), and healthy. Oh, and I want it to taste good too.
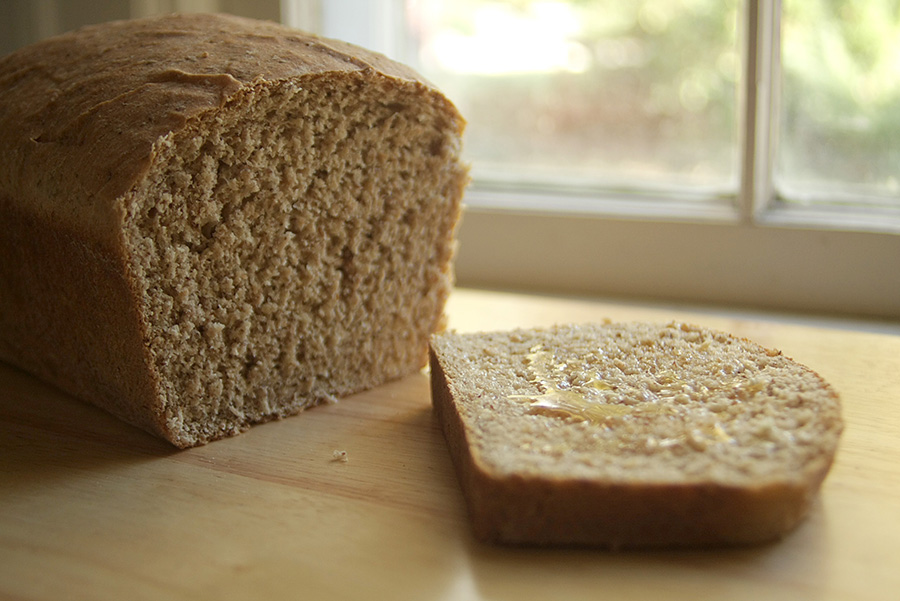
I’ve learned a lot, and although I’ve only scratched the surface of bread baking I feel it’s time to celebrate a small victory. It involves a 100% whole wheat bread that is soft and sliceable, a little sweet, with a nice crust and just a little fluff to it. This is hands down the best wheat bread I’ve made without incorporating some white flour.
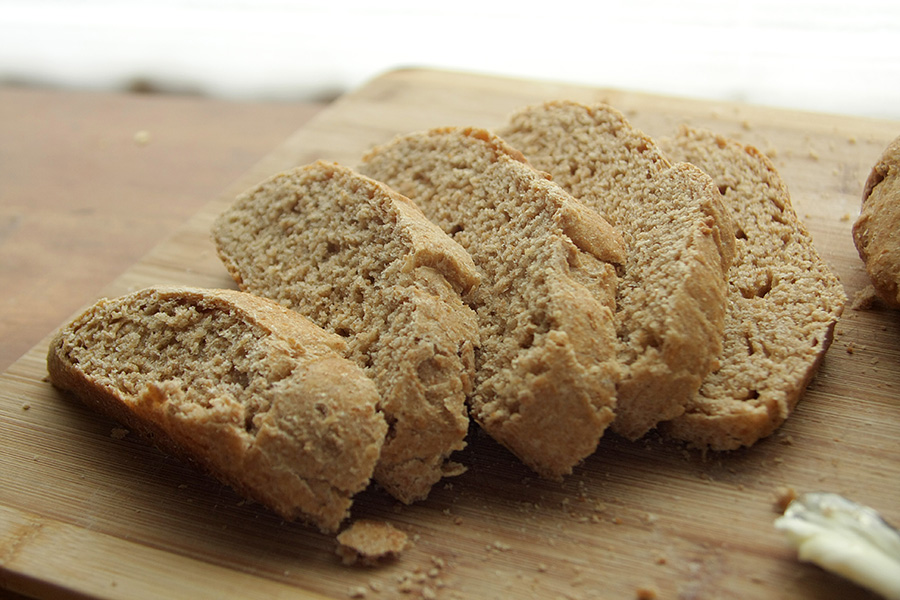
Almost all of my other attempts at this type of bread have been dense and dry. We ate them anyway, but what was delicious fresh from the oven with butter and honey was usually dry within the next day or so. I’d make the remainder into croutons or bread crumbs and try again with powdered milk, or gluten flour, or an egg, anything to help my little loaves rise. Because wheat flour is so stubborn that way – it’s heavy and dense and it needs some help.
 To understand why wheat flour works the way it does, it’s helpful to understand the interaction of different elements in the dough: the protein, liquid, gluten, and yeast.
Whole wheat flour is ground from the whole kernels of wheat. But white flour is made from kernels that have been stripped of their bran and germ, parts of the grain that contain the most nutrients. It makes for a lighter product but one that offers little nutritional value. To compensate, millers add vitamins and minerals after the flour has been refined. When you see “enriched white flour,” that’s what you’re getting.
Wheat flour has about 25% more protein than white. When the protein absorbs liquid in the form of milk or water added to the dough, gluten is developed. (It’s important to note that high protein does not always mean high gluten.)
 Gluten is essential for building a sort of web within the dough which the yeast (once activated by warm water and a pinch of sugar) fills with gas, causing the bread to rise. So the more gluten, the fluffier and chewier your bread will be. And the higher the protein content, the more likely it is that the gluten will develop.
When you find bags marked “bread flour” in the store, it means the flour has a higher protein content and is more suited to making the kind of fluffy bread we’ve grown accustomed to. But in some places you can also find “gluten flour” which has an even higher protein content. You can add a few tablespoons of gluten flour to a cup of all-purpose flour to make your own bread flour.
Once I misunderstood a recipe and used gluten flour in place of bread flour – big mistake! The bread rose to an enormous height and when we cut into it, there was a hole in the loaf so big I could put my fist in it. It was so chewy my teeth couldn’t easily break it down. Good for a laugh but not much else!
 When I looked at the protein content of these different types of flours, I got a little confused. Whole wheat flour ranks higher than both all-purpose and bread flour in terms of protein. If protein + water = gluten and gluten helps the bread rise, then what’s keeping my whole wheat bread from rising as high as my white bread?
The problem is actually in the shape of the bran. The jagged particles of bran are tearing at the web of gluten being formed, so the yeast doesn’t have much to work with when it’s trying to inflate the dough.
So what can you do? Different people have different tricks for getting their wheat bread to rise well.
You can knead it for longer – at least 10 minutes (by hand) for a whole wheat bread to really encourage the gluten.
You can add things to the dough like gluten flour, white flour, milk, powdered milk, potato flakes, or eggs.
You can give it time. Letting the dough sit gives the wheat time to absorb the moisture, which softens the bran. This could mean a longer rise or a series of rises.
You can start with an initial soaking of the flour or making a moist starter dough.
I tried nearly all of those things and had success with incorporating white and gluten flour, but wasn’t happy with the compromise. I even gave it time, sometimes letting a wheat loaf rise all day in hopes that it would double in bulk. My mistake was not starting with a moist enough dough in the first place.
Others have had success using their stand-up mixers or bread machines to make a high-moisture 100% wheat dough. I don’t have a stand mixer but I can attest to the hopelessness of kneading a wet dough by hand for 10 minutes or more. You can’t do it without adding more flour, and I wasn’t about to go out and buy an expensive appliance to help me do the job. I like to take full credit for my kitchen creations if possible. It’s a mix of love and pride that compels us to create everything here from scratch and mark it as handmade.
I suppose that’s why I stuck to hand-kneading for so long. And my bread kept coming out dry. But I stumbled upon the answer the other day when I opted to use a recipe that forgoes the kneading all together. I threw some dough together on Sunday night, left it out while we went for a St. Patrick’s day drink, tucked it in the fridge before bed and (after another rise) had bread the next morning.
I first heard about the no-knead method when I read The Art of Eating In by Cathy Erway. Erway tried Jim Lahey’s original recipe, which calls for a very long, slow rise of 12 to 18 hours at room temperature. She fell in love with the method and never worked with traditional recipes, but I was the opposite. Although intrigued, I lacked the proper cookware and the foresight needed to plan a loaf of bread so far ahead of time. Plus I had come to think of kneading as a sort of meditation. I liked the physicalness of it; the other method seemed lazy in comparison. So I never gave no-knead a go.
I never did connect the dots between whole wheat and high moisture until I had the proof sitting in front of me: my first perfect 100% whole-wheat loaf. And I didn’t have to wait 18 hours to get it. Like Jim Lahey’s method, the actual work you put into this recipe amounts to little more than five minutes. And it does require a slow rise, but only for 3 to 5 hours initially at room temperature. Then you stick the dough in the fridge and use it anytime within the next two weeks.

 Probably the best thing about this recipe is that you’re able to make a fresh loaf of bread whenever you have a few hours to spare, so long as you keep a large batch of dough in the fridge that has already gone through the first rise.
I haven’t made Lahey’s recipe yet (it’s next on my list) but I think this one is probably more suited to busy time schedules and people who don’t mind making the same recipe over and over, since once you’ve made a large batch there’s little room for variation in each loaf. Since whole wheat sandwich bread is a staple in our kitchen, it fits the bill.
Because I wasn’t sure how it would turn out, I halved the recipe, but it is easily doubled again. Here it should make two small loaves or one large loaf around the size of two pounds. When doubled, the recipe makes three 1 1/2 pound loaves.
No-Knead Whole Wheat Bread adapted from Artisan Bread in Five Minutes a Day.
3/4 cup water
3/4 cup milk
3 teaspoons active dry yeast
1 heaping teaspoon salt
1/4 cup honey
3 Tablespoons oil
3 1/3 cups whole wheat flour
In a small saucepan or ibrik (long-handled Turkish warmer), combine the water, milk, honey, and oil. Warm to about 100 – 115˚F, stirring to dissolve the honey. Then stir in the yeast, cover with a lid, and set aside while you ready the dry ingredients.
Measure the flour into a bowl (leveling each scoop with the flat of a knife) and mix in the salt. When the yeast is activated and foamy (should only take a minute or so), add the wet ingredients to the dry and stir with a wooden spoon until everything is uniformly moist, without any dry patches. No need to knead here!
Cover the bowl with a lid or plastic wrap (but make sure it’s not airtight) and allow the dough to rise at room temperature until it begins to collapse, or at least flattens on top. For a whole wheat bread this should take 2 to 3 hours but a longer rising time (up to 5 hours) won’t hurt the result.
Refrigerate the dough overnight or at least 3 hours before using it; cold dough is easier to work with.
When you’re ready to bake a loaf, take out the dough and scoop it out of the bowl with hands that are slightly wet. Shape it into a ball by stretching the surface of the dough around to the bottom on all four sides, rotating the ball a quarter-turn as you go.
I had difficulty with this step when forming my loaf – the dough wasn’t elastic enough and seemed to be breaking apart when I tried to stretch it. I dusted the counter with a little bit of flour and kneaded it a few times until it had the right texture, and then it was good to go.
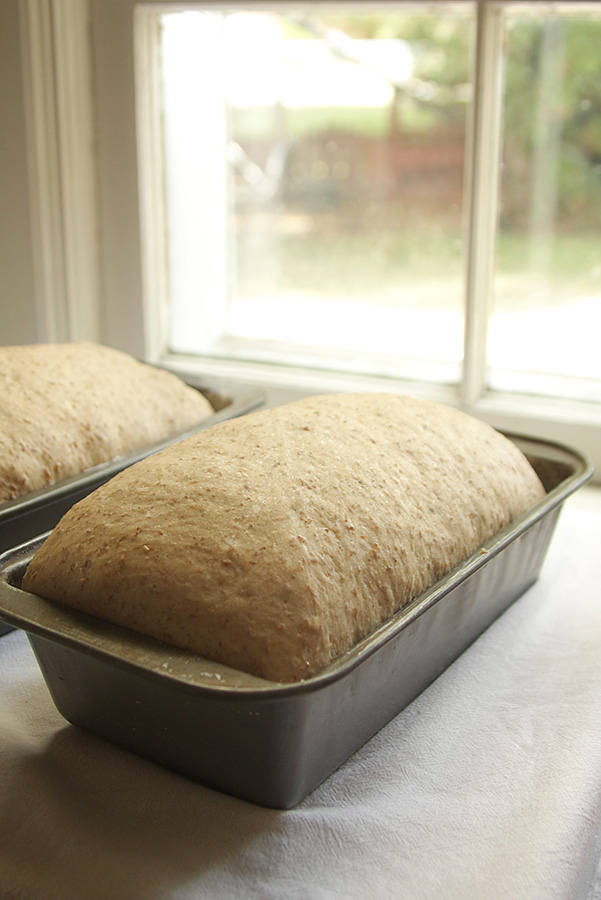
Drop the dough into a lightly greased loaf pan or place it on a baking sheet for a free-form loaf. Allow it to rest for about 2 hours or until nearly doubled in bulk. Flour the top of the loaf and slash it using the tip of a serrated bread knife.
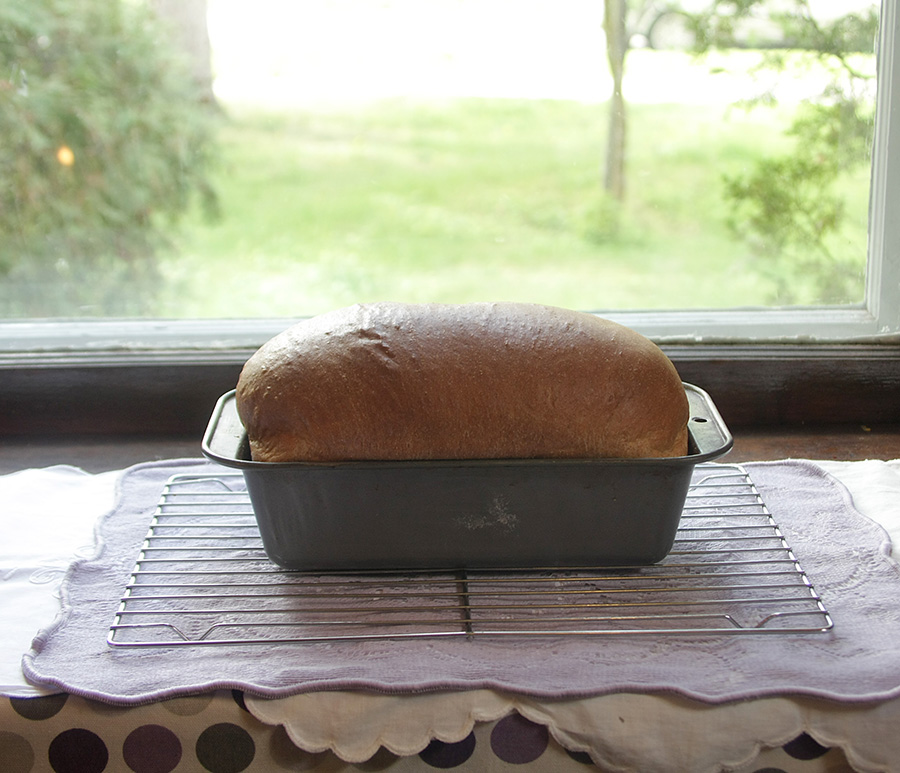
Twenty minutes before baking time, preheat the oven to 350˚F. When the oven is ready bake the loaf for 50 to 60 minutes (shorter for small loaves, mine only took 30 minutes) or until golden brown and firm. I like to take my bread out when a thermometer inserted into the middle of the loaf (through the side so as not to ruin the pretty top) reads 190˚. And for a crispier crust, throw a handful of ice cubes into the bottom tray in the oven when you put the bread in to create some steam.
Further reading:
Tips for Baking Whole Grain Breads
Take the retrospective tour here:
(Click on any image to start the slide show.)