
A few weeks ago, some friends of ours invited us to their homestead to glean fruit from their fruit trees, which were so ripe with plums they had more than they knew what to do with. This was just the sort of opportunity I needed to cash in on a load of free fruit for a fall canning extravaganza (the results of which we would share with our friends of course!) So Jen and Chris gave us directions and we drove up to the historical Moon Randolph homestead.

This amazing place is tucked away in the north hills of Missoula, just a short jaunt from town up a dirt road. Here old buildings stand in various stages of decay and disrepair, some of them still in use, others repurposed – like the chicken coop converted into a home for the current caretakers.
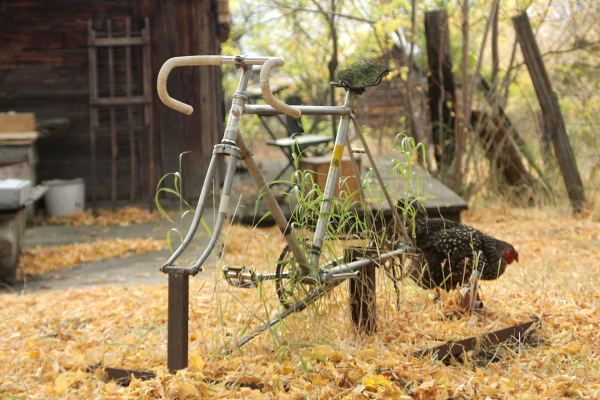
Chickens strutted and clucked and pecked about in the fall leaves.
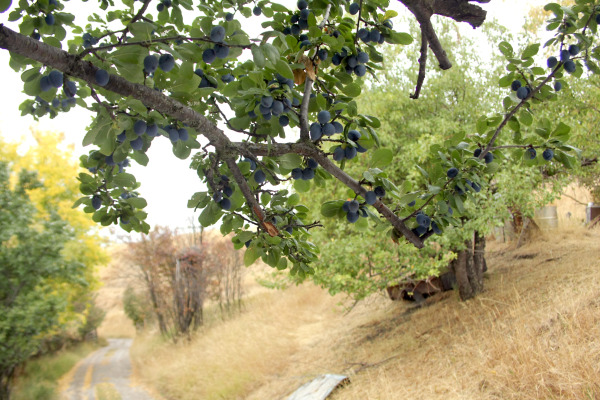
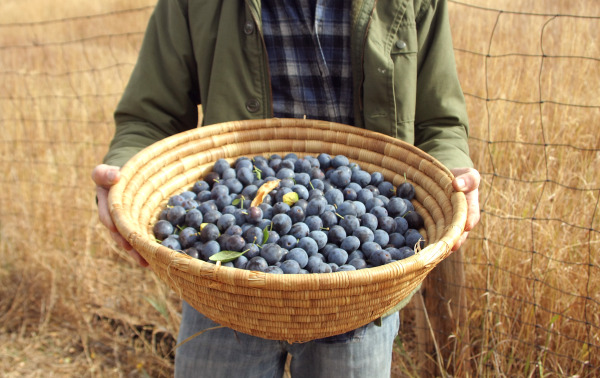
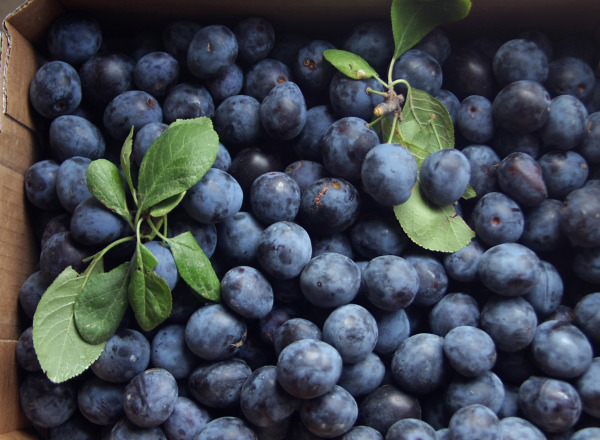
Ripe plums hung heavy on the branches of trees lining the road. We shook them down onto tarps, next taking turns on the ladder plucking off some of the more stubborn ones.
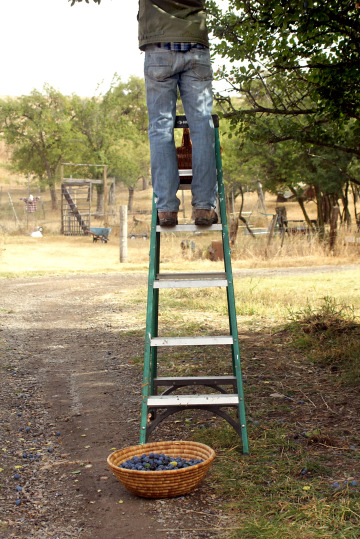 I can’t say for sure how many plums we gathered, but we estimated somewhere around 16 to 20 pounds.
I put them in shallow boxes, trying to spread them out to prevent squishing – Jen said that if left for too long, the weight of the plums on top reduces the plums on bottom to mush.
That day when we got home I picked through each box, removing stems and leaves and the occasional rotten plum or wandering white spider.
Throughout the next week I would turn nearly all of them into jam; 15 pints in all. This being my first time cooking with fresh plums (or any plums for that matter), and also my first time canning such a large quantity of jam, I conducted a new experiment with each batch. I wanted to see what tasted the best, and also what was the easiest method of converting raw fruit into jam. Peeled or not? Diced or mashed?
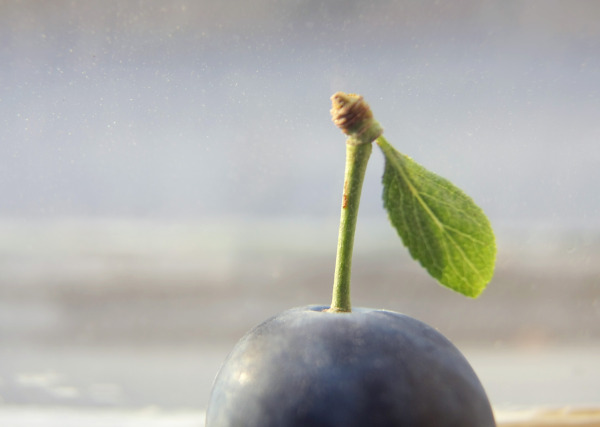
These plums have a pale flesh on the inside and are really tart but delicious to eat raw or cooked. Once you cook them though, they turn a brilliant sort of scarlet fuchsia. If you thought that tomatoes were stain-inducing… well, they’ve got nothing on these plums. The color comes from the peels but it bleeds into the flesh as soon as they’re heated up and the plums start to break down.
Now, I know it is not always necessary to use pectin in making jam. I used it here because I was interested in a quick, high yield batch of jam made without too much sweetener. It’s totally possible to make a great jam without it; you just need to reduce the liquid in your recipe into a thick syrup, and make sure that you have enough natural pectin in there and enough sugar. It will take a little extra time and extra fruit to make the same amount of jam that you’d make using store-bought pectin.
Next time I will try it that way, but I tried using Pomona’s pectin in my first batch and liked the results, so I decided to use it as a control in my experiment for the other two batches. Pomona’s Universal Pectin is a natural product derived from citrus peels. I’d recommend trying it out if you’re new to this whole jam thing. It is possible to add too much and come out with a uber-gelatinous jam, so read the instructions and err on the side of less if you’re not sure. My three experimental batches went as follows (each of them yielding about 8 half-pints)
1. Jam with plum puree sweetened with sugar, without the peels
8+ cups plum puree, 2 cups sugar, a squeeze of lemon, 4 teaspoons calcium solution and 4 teaspoons pectin
Removing the peels from plums is a messy business. You can do it like you do peaches or tomatoes; make a little x-slice in the bottom of each one and drop them in boiling water for 30 seconds. I found that after 30 seconds, maybe half the plums were ready to peel, but the rest were still being difficult. So I let them boil a little longer, then transferred them to a bowl of ice water.
Half of them peeled easily; the others had gone all mushy on the inside. I pulled off the peels, but there was still the problem of the pits. I dumped the whole mess into a colander and pressed it through into another bowl, leaving the pits behind with some plum flesh still clinging to them. At this point I actually had the bright idea of putting the remaining stuff into my salad spinner, thinking that maybe the centripetal force would pull the rest of the fruit off the pits. So I can tell you now that the extra tablespoon you’ll get is not worth the trouble.
Then I strained that whole mess through a fine-mesh sieve to drain some of the juice out so my jam wouldn’t be watery. Have you ever tasted fresh plum juice? It’s heavenly… thick and syrupy and sour, I had never tasted anything like it. We got about a pint leftover from our first and third batches of jam. You can mix it with maple syrup to pour over pancakes or throw some in a smoothie or just sip it. It’s powerful stuff.
So then I had my plum puree, ready for jam. It turned out great but I don’t think I’ll ever again bother to remove the peels.
2. Spiced plum preserves (with peels), sweetened with honey and spiced with cinnamon and nutmeg
8+ cups diced plums, 1/2+ cup honey, lemon, 1 cup of applesauce, dash of nutmeg and a cinnamon stick (removed before canning), plus 4 t calcium solution and 4 teaspoons pectin
For my second batch I opted to leave the peels on and remove the pits with a paring knife. This process was somewhat labor intensive but much less messy because they hadn’t been cooked yet. Pits are easiest to remove if you cut the plums in half, then quarters. Then I diced them up a bit smaller until I had a little more than 8 cups. That went into the preserving pan, then I threw the applesauce in there for the hell of it and let it cook with a cinnamon stick and some nutmeg. All the plum juice here went right into the jam (thickened by pectin). I suspect it worked out because the plums didn’t retain any water from the initial boiling-in-water-for-one-minute step, having skipped that step entirely. I like how clean this process was (no stained hands!) but I kind of like having that extra plum juice as a by-product.
3. Jam with plum and apple puree (with peels), sweetened with sugar
8+ cups puree of plum and apples, 2 cups sugar, a squeeze of lemon, 4 t calcium solution + 4 t pectin
For my third batch, I was running a little low on plums but had a bag of apples that needed to be used up fast… Hence, apple plum preserves. Again I cooked the plums in boiling water for a minute. I didn’t bother with the ice water, just putting them in a big bowl and letting them cool. It was a mushy red mess of plum flesh. At this point if I had tried to push it through a sieve I think the peels might have been a problem. So I used my hands again, picking out the pits and throwing the fruit flesh (and peels) into the preserving pan; what was left was the thick plum juice, still warm… delicious. Then I cored and sliced some apples, and as an afterthought, I blended it all together (several batches in the blender) with the plum puree before returning it to the pot. The peels were now imperceptible, but they lent their nutrients and their pectin to the jam. Perhaps I didn’t even need Pomona’s pectin in this one, but I used it anyway to firm up the extra juice and get a higher yield.
——————————-
So there you have it: three ways of turning plums into fruit mash for jam. I am not going to give you an exact recipe here. The point is to play around with it… canning is not actually that difficult, you just need a jam that’s thick enough, some hot clean jars and enough hot preserves to fill them with.
Plum Jam
Put a small plate or dish in the freezer and place your jar lids in a heatproof bowl.
Pit, and chop/mash your fruit – have at least 2 quarts (8 cups), enough to fill 8 half-pints or 4 pint jars. You can do this a day ahead of time, or while the jars are sterilizing.
Ready your canning pot: Place your pint jars or half-pint jars on a rack in the bottom, then fill with enough water to cover the jars and bring to a low boil. Then ready your fruit and heat it in your preserving pan. Add the calcium water and stir, then bring the mixture to a boil. Mix the pectin powder into the sugar or honey, then add it to the fruit, stirring well to dissolve. Return to a boil and test the jam by putting a little spoonful on the cold plate in the freezer. If after a minute the jam has jelled, it’s ready – remove it from the heat.
Carefully remove the jars, pouring some of the water into the bowl with the lids. Place them on a clean towel. Pour the jam through a wide-mouth funnel into the sterilized jars, leaving 1/8 inch head-space. Wipe the rims clean with a damp paper towel, then seal (careful not to screw on the lids too tight). Transfer them back to the pot and process in boiling water for ten minutes (plus a minute for every 1,000 ft you are above sea level). Remove to a cooling rack and do not disturb for 10 hours. Make sure the jars are sealed correctly by pressing gently on the safety seal on top. If it pops back something went wrong, so stick that jar in the fridge and use it up in the next couple weeks.
If you hear popping sounds when the jars are cooling, don’t worry! This is just the jars releasing pressure and it means the vacuum lid is being sealed.
I do think the apple plum jam was my favorite, and the spiced plum jam I tried was quite tasty but I think it will be even better after it sits on the shelf for a few months.
All of them are sour and delicious (add more sugar if you like it sweeter) and the consistency and taste is really not too different from one batch to another.